
We may be indebted to Romanian lace for the glorification of our country, but even better is the fact that you can learn this type of needlework not only in Romania. In our article we will talk about Romanian lace, for beginners, the step-by-step instructions below will be very helpful.
You can create interesting, unique products yourself, but this will require a lot of patience. We can definitely say that the time and effort spent is worth it to admire the result. This needlework technology appeared a long time ago and has been pleasing others with amazing decorations for decades and even centuries. There is more than one method by which you can create lace, one of them will be shown in our master class.

Historical facts
The information that has come down to us from our ancestors tells about the extraordinary Romanian products that were used to decorate houses, household items and clothes. This diversified houses, women's outfits, added sophistication and beauty. Each lace was made by hand, so the product was considered completely unique. The craftswoman first wove the threads at home, and then proceeded to create lace.
Today, you can no longer waste time creating threads, because they are sold in large quantities in specialized stores and there will be no problems with the choice. If you are interested in the classic look of the product, then it comes in tapestry, woven lace or flower-like shapes.
For manufacturing, both before and now, a certain canvas is used, either nylon or canvas, the main thing is that there is no pattern on it. The choice of color combination is a separate matter, you need to take into account the bulge of the forms, the pattern, the desired realism, all depending on the chosen scheme and model.
Before starting work, the canvas was processed so that it would not decrease after work was completed. If the pattern was made on a tapestry, then a non-standard needle was used, which had a large eye. Of the threads, floss is excellent both in thickness and quality. Weaving methods are completely different - from bobbins to macrame and crochet.

Few features
As you can see in the video, lace is used to make Romanian lace. An ordinary needle connects the contours with the help of hitches or various elements. Therefore, we can say that Romanian lace products are called coupling.
It is especially attractive that the finished products are quite voluminous, it depends on the particular model. Some use linen, silk, wool, or even cotton and viscose threads.
Crochet cord, it is quite simple and fast. If you take a larger hook, you will end up with voluminous lace. Even the fact that Romanian lace is a bit heavy in finished form does not change the fact that it looks elegant and elegant in the interior. In a house with such interior items, a warm and romantic atmosphere is created.
To make clothes from such lace, some knowledge and skills are needed. But if you decide to make yourself some piece of clothing the first time, having tried, you will succeed.
Lace is used to create various designer items, such as clothes, bags, napkins in this technique also look cool.
A simple lesson
We will bring to life the original model with a clear technique. Step by step, we will begin to disassemble the sequence of actions from the very beginning. We will make the product, as in the photo:

To begin with, we will make a dummy of fabric in order to approximately understand how the finished product will sit.
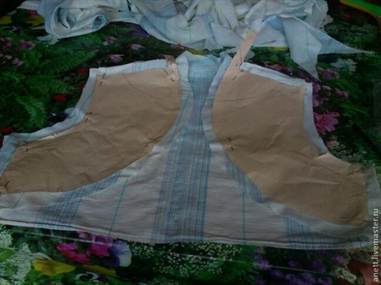
For work, we need a cord, from which the product, fabric, threads, needles and a hook will be weaved. This thing is not made in one piece, but in parts, and then sewn together.

You can search for any ornaments that you like on the Internet or books and translate it with the help of tracing paper, and then on the prepared canvas we lay out the appliqué in shape with a cord and fasten it with pins.

The cord is completely sewn to the base. You can make the first element just for testing.

It is most convenient to work with the hoop. If you have been embroidering, then these hoops are perfect for you. The main thing is that they keep the fabric in the right tension.

With a thread, the cord is sewn onto the canvas exactly according to the pattern.


And so gradually fill the entire figure.


In total, you get 12 finished parts of the same size, and one for a larger back.


In the classical application, Romanian lace is more common in interior items - tablecloths, curtains, napkins. To decorate clothes, it is usually used in combination with other techniques. Very beautiful lace wedges, inserts, coquettes look luxurious and stylish. If you decide to use Romanian lace for your models, keep in mind that, despite the apparent airiness, this lace is quite dense, even hard. And this is unacceptable for some things. You can choose a life-size Romanian lace pattern for knitting from our article.
To make Romanian lace you need to prepare:
- fabric: durable, not thick, preferably plain (we will mark the pattern on it, the print will interfere), it can be used;
- polyethylene film according to the size of the knitting pattern;
- threads - “Iris”, “Snowflake”, “Chamomile”, etc. We will need a set of two types of threads of the same color, at different thicknesses: for knitting a cord - thick, for embroidery - thinner;
- hook No1.0;
- embroidery needle: the eye of the needle should not be thick, otherwise it will be difficult to pierce the cord
- sewing threads to mark the cord: the color should be contrasting in comparison with the main threads. Required condition: threads should not shed;
- ordinary sewing needle;
- scissors are small, with pointed tips;
- thimble.
Lace knitting: a master class with a description
Stage one
We decide on a lace pattern: we are looking for ready-made patterns or, showing imagination, we come up with a plot for knitting on our own. Schemes for cutwork or chips for bobbin lace are successfully adapted. When drawing a diagram, it is necessary to take into account the thickness of the cord. The drawing is applied to paper at a scale of 1: 1.
Stage two
We put the paper drawing on the fabric, cover it with polyethylene and sew it all together. Polyethylene will not allow the threads to get dirty from the paper.
Stage three
We have reached the knitting of the cord. Here you will need to decide which is more convenient for you: knit one, very long cord and then cut it in accordance with the pattern, or knit the cord in pieces, immediately of the desired length.
In the first option, when cutting the cord, do it with a margin. The excess length must be dissolved and with these threads sew the cord to the right place.
With the second method, do not forget to periodically check the length of the cord with the pattern during the knitting process.
Master class on knitting cords for laying out a pattern
Cord “Caterpillar”
For knitting, it is best to use cotton, silk or mixed threads. The knitting technique is shown in detail in the images of the diagram.
And now consider a step-by-step master class:
We knit 2 VP. The first - do not delay.
We introduce the hook into the 1st p. (It is not tightened with us).
We grab the thread and pull out the loop. We got 2 sts on the hook.
We knit them together like RLS.
We turn knitting to the left, leaving the thread at work. This technique - turn to the left and the thread at work - will be constantly used for this cord.
We start a hook for broach.
We knit a loop. We get 2 sts on the hook again.
Let's do the turn again.
We start a hook under both broaches.
We knit both loops together.
It turns out a neat and pretty cord.
We knit the caterpillar cord: video MK
Cord “Wide Caterpillar”
The knitting technique is the same as in the previous cord, but the wide one is knitted on 3 rather than 2 loops.
Master Class
We knit 3 VP, the first one is not tightened.
From the central p. we knit another 1 p. On the hook we get 2 p.
From the extreme loop we knit a stitch and knit both stitches together.
We turn the knitting to the left, leaving the thread at work, and knit a loop from the RLS of the previous one. R.
Again we knit both sts together.
Then we knit a stitch from 2 broaches, we knit the loops together.
We turn the work and continue knitting using this master class. It turns out a wide caterpillar.
We knit the cord “Wide caterpillar”: video master class
There are many more options for knitting cords. Choose for yourself the one you like the most. We offer you some schemes to choose from.
We knit the cord “Hearts”: video MK
Stage four
We draw the Romanian lace with a cord, sewing it along the outline of the pattern. The cord fastening must be strong. It is impossible to sew the ends of the cords overlay, it should only be a joint. And when laying out the curls of the pattern, adjusting the cords on top of each other is quite acceptable.
Stage five
It is necessary to sew the cords with each other at the joints and overlays using the same threads and very carefully. Ideally, it's invisible. How to do it right - see the master class in the photo.
Stage six
Consists of directly embroidery.
To do this, we use threads thinner than for knitting a cord. Romanian lace is most often embroidered with darning, buttonhole, scalloped, knotted or cordon stitches. Consider the master class on their implementation in more detail.
Scallop stitch
Reminiscent of a seam for winding loops, but different from it. The peculiarity of the stitch is the looping of the thread in the form of a loop around the outgoing end of the needle. Usually a single bypass is sufficient, sometimes a double bypass is made. Although simple, scallop stitches can be varied, with the difference depending on which direction the needle goes through the loop. Variations arise due to the peculiarities of the location of the stitches relative to each other, as well as due to different stitch lengths.
Let's take a closer look at the technique of embroidering scalloped stitches.
To fill with a mesh, for example, a square, we begin to embroider scallop stitches along the lower edge of the cord on the upper side of the square. 1st p. stitch from left to right. To do this, we lead the thread down from left to right with an arc, we insert the needle into the 1st p. of the cord from top to bottom. We pull the thread, while the arc decreases, tightens and the thread lies at the base of the loop into which the needle was led. So repeat until the end of the row. The stitches must be identical.
They differ only in location and combination. When moving to the lower located river. we draw the thread with a needle inside the cord, the distance depends on the pattern. The next row is embroidered in the opposite direction. We now also lead the thread down, but from right to left, in an arc. We also introduce the needle into the 1st p. of the upper river. pattern formed between two scalloped stitches, from top to bottom right, and tighten the thread. So we repeat until the end of the river.
The scalloped stitches should be loose, not touching the fabric on which the pattern is applied. We fill the beginning and end of the working thread in the cord. Cut off the end. Most often found:
- dense scalloped stitches: embroidered on each stitch of the cord and fit tightly to it;
- rare scalloped stitches: embroidered through 2-3 stitches of the cord;
- a row of groups of scalloped stitches: stitches are embroidered in groups of 2-3 stitches each, then a gap between them and again a group of stitches;
- a number of free rare scalloped stitches - the stitches are embroidered through 1-2 p. of the cord and sag freely.
Darning stitch
In the example, the seam is made on three threads. Order of execution: we insert the needle from left to right under the thread, bring it out in front of the middle thread, go around it from above and insert it under the right thread from left to right.
In the opposite direction, with a needle, we bend the right thread from right to left from above, insert it under the central thread, bend it from below, bring it up and bend the left thread from right to left from top to bottom, etc.
Seam cordon
The seam is sheathed with individual columns, which are most often used as brids.
The working thread comes out of the cord and wraps around the stretched threads until the entire column of stretched threads is covered with stitches tightly adjacent to each other so that the column turns out to be in the form of a cord.
Buttonhole stitch
The execution of the seam depends on its position. It can be positioned from left to right and right to left:
- if the seam is located from left to right, then the 1st p. is obtained as follows: we draw the working thread clockwise so as to get a closed coil of the spiral, we pass the needle vertically down under the bridle, which we overcast, to the right of the starting point;
- if the seam is located from right to left, then the 1st p. is obtained thus: we draw the working thread counterclockwise so as to obtain a closed coil of the spiral, we pass the needle vertically down under the bridle, which we overcast, to the left of the starting point.
To get knots on top of the brida, we stretch the thread under it down (towards ourselves), then we pull it away from us in a vertical plane. As a result, the loop crosses, stretches, the knot moves up, and the working thread also goes up. The next turn of the spiral repeats the first one, the new stitch lies to the left of the previous one.
knotted sutures
It is used when the pattern is formed by tying several threads with different knots. The most common of the knots are oblique tambour and Turkish knots.
With an oblique tambour knot, the threads forming the “flagellums” are pulled together by means of an oblique cruciform knot, in which the working thread is folded to the right with a loop, and the needle passes from above the working thread and under the next three threads, goes over the loop and tightens three threads into the “flagellum”.
The figure shows how the working thread runs in the middle of a narrow path from the outside, and how 3 threads are tightened in the middle with one knot, and the working thread connects one group of flagella to another.
The Turkish knot tightens the flagella with a double knot, without a transverse thread.
The figure shows that every 3 threads are connected by a Turkish knot. The algorithm is as follows: we keep the work vertical. We fix the working thread on the left cord, we bring it out of the loop of the third transverse thread, we lead parallel to this thread to the middle of the seam, then we lead the working thread with a loop to the right and make the first tambour knot, we lead the working thread with a loop to the right and we make the 2nd knot, to the right 1- go. We bring the working thread to the right cord of the stitch, insert the needle into the loop of the third thread, draw it lower along the cord and also bring the 3rd thread out of the loop.
Since the working thread, which pulls the “sheaf” with two knots, runs parallel to the third transverse thread, the “sheaf” is no longer obtained from three, but from 4 threads.
Simple Russian stitch and Russian stitch with buttonhole stitches in Romanian (lace) lace: video master class
There are many ways to fill patterns, each is selected for a specific model.
For beginners, we offer a master class of several typical options.
And now, when we have studied in detail how the Romanian lace is performed in stages, we suggest that you look at the general master class with a photo.
Romanian lace, knit a leaf: video MK
https://youtu.be/NQRFwiL0A3U
Napkin
We transfer the drawing of the scheme to the fabric, tighten it with a film.
We knit the laces, leaving long pieces of thread at the ends. We tightly fix the cords on the fabric.
With the left threads at the ends of the cords, we sew them together.
The pattern is already being drawn.
Petals in a small and large flower for this model are made in different techniques.
Finished master class on embroidery.
We rip off, remove excess threads, lightly clean with a moistened cotton swab, iron through the fabric.
We knit a collar using the technique of Romanian lace: video master class
https://youtu.be/UOCmqTr2p_4
And now, completing our master class, we bring to your attention several options for schemes. By printing them in full size, you can make Romanian lace for various clothing models or for interior items.


Every craftswoman who knows how to knit wants to create works of stunning beauty. And, perhaps, any of them knows that there is such a unique technique as knitting Romanian lace. But not everyone, even recognized masters of knitting, dealt with this technique. However, many had at least once an irresistible desire to try their hand at this type of needlework. Therefore, dear needlewomen, a master class with patterns for beginners is presented to your attention.
Crochet Romanian lace: weaving a cord
Since Romanian lace is based on the technique of cord lace, we propose to start by considering the methods of weaving cords necessary for the execution of this type of knitting.
For our cord we need:
- hook;
- threads (cotton is best).
1) To get a simple caterpillar cord, we perform the following series of actions: 

This type of cord looks good both from cotton, and from silk, woolen and mixed types of threads. This cord is considered the main one and is most often used in the manufacture of products using the Romanian lace technique.
2) Another version of a simple cord that can be done like this: 

3) To get a more complicated, openwork cord, we follow the following instructions: 

Such cords have many modifications, for every taste, and have a good basis for the flight of fancy of any needlewoman.
4) There is also a technique for making a cord, which in itself is a lace pattern.  It is performed as follows:

Making lace
Romanian lace is also referred to as coupling lace, and all due to the fact that the intended pattern of the desired pattern is laid out with a home-made cord along the contour applied to the fabric for convenience, and inside it is filled with various couplings and patterns that are made with a needle.
So, we already have a cord. Let's move on to knitting the lace itself.
For work you will need:
- embroidery needle (with a thick eye to pierce the cord without any problems);
- sewing needle (for attaching a basting);
- any durable fabric (for the backing);
- pencil (to transfer the desired lace pattern to the fabric);
- we knitted cord;
- threads (preferably a much thinner diameter than those used to make the cord);
- the threads are thick, of a contrasting color with respect to the future lace (to secure the cord along the contour of the future embroidery).
Crochet Romanian lace: a master class with photos
You can move on to the full-fledged production of Romanian lace, and the Romanian lace master class will help beginners in this technique.
Little lace leaf
 Flower in the technique of Romanian lace
- We draw the cord to the contour of the future lace applied to the fabric


- Repeat the same steps with other petals
- We finished with the petals, we admire the result

- Filling the center of the flower


- We detach the resulting flower from the fabric by cutting off the basting

Using the Romanian lace models and patterns, we move from simple lace products to more complex ones. For example, to the manufacture of lace napkins.
Beautiful napkins in Romanian


Also one of the simplest filling techniques most often used by craftswomen:

- Beautiful edging lace patterns

Now we have an idea of how Romanian lace is knitted and we understand that their diversity has no limits. Romanian lace is a great way to apply all the immensity of the needlewoman's imagination in practice!
Crochet Basics
It was Romanian lace that distinguished its country from other countries, but in order to start working with this lace and do wonderful work, you do not need to immediately go to Romania. You can make interesting and unusual products with your own hands, the main thing is to be patient, because the result is definitely worth it. Not only Romanian lace, but also other similar products, for example, Hungarian lace, or Vologda lace, captivate with their beauty, attract and sharpen everyone's attention. I really like to watch video tutorials on creating lace and a variety of new items that craftswomen generously share on the Internet.
Such laces have long been considered decorations and do not cease to please people. There are many different ways and techniques to create lace, such as whooping cough or shuttle weaving, knotted macrame or simple knitting, fork or crochet. Our instruction is dedicated to the creation of Romanian lace, which is often used to create floral motifs, leaves and butterflies.
What materials and tools will we need to work.
In order to create Romanian lace, you need to prepare special tools and materials:
- Durable fabric.
- Thick and thin threads with one shade.
- Crochet hook.
- Needle for embroidery with a thick eye.
- Sewing threads of a similar color as for making a cord.
- Needle for sewing.
- Sharp scissors.
- Thimble.
First you should take a drawing to create a thing, for a beginner in this business, it is best to take a simple napkin. You can choose a picture or come up with your own. You can take the following ready-made specimens, for example, cutwork or a pattern for bobbin lace.
If we do the drawing ourselves, then it is worth considering the width of the finished cord, and put the picture on paper. When the image is ready, the paper with the image, fabric and polyethylene are combined, this will help protect the cord from contamination.
Romanian lace patterns, mk.
You can tie a cord different ways. In the first option, you can make a very long cord, which gradually winds up into a ball as you knit, and in the process of work it needs to be cut in certain places, where necessary, in accordance with the image.
We do the circumcision with a small margin of cord so that it can be unraveled and with these threads we connect the details of the lace in some places. In the second method, we immediately make a cord of the desired length, in the process of this we constantly apply it to the image and work according to the scheme. Many craftswomen choose the second option for creating lace, because this way the work seems more exciting.
After preparing the cord, it is attached to the fabric, in accordance with the outline of the pattern. You need to sew it firmly to fix it firmly. Important! The last particles of the cord are sewn together at the junction; they cannot be superimposed on each other.
In the process of work, unlike the ends, the cord can intersect, making, in this way, different curls. Therefore, at the intersections of the product, it is sewn with the same threads, firmly and imperceptibly.
At the end we do embroidery.
Gallery: Romanian crochet lace (25 photos)


Lace lace master class and detailed description
 Romanian lace is lace lace. The lace is crocheted. The lace is quite beautiful. Lace, because in the manufacture of this lace, different cords are used, which are placed on the pattern.
One of the popular cords that is used in the manufacture of Romanian lace is caterpillar cord.
Some parts in Romanian lace are interconnected. Brides created with a needle are used to connect these parts. And the empty spaces between the details of the lace are also filled with a needle.
Step by step creation process and description:
- Step 1.
First we need to find an image for our future thing. For the first time, you can take a regular napkin. You can come up with any drawing, you can take samples for cutwork or chips for bobbin lace.
- Step 2.
After choosing a pattern, we sew together the fabric and paper with the image, and then the polyethylene.
- Step 3.
We start knitting a cord. There are two options for the process itself. You can create a long cord by winding it into a ball as you work. When you tie a large ball, and you start sewing the lace to the base fabric, it will need to be cut in one place according to your image. It is necessary to cut off with a certain margin in length.
Another way is to create a cord of the desired length at once, periodically applying it to our pattern.
Now for the strings:
The most commonly used cord, known to everyone with the name "caterpillar". The second type of product is the "wide caterpillar". They knit it in much the same way as a simple caterpillar. The main difference is that an ordinary caterpillar is knitted on two loops, and a large caterpillar on three loops. Before connecting the two side loops together, we make a regular column for both walls.
These two cords are quite enough for laying out the image itself. For tying the finished thing, you can use all openwork cords.
- Step 4.
You need to sew quite firmly so that the cord is fixed. Remember, the ends of the lace are never laid on top of each other, they are joined end-to-end.
Today, about 1,500 lace weaving techniques are known in the world. All of them have come down to us from antiquity. Everyone knows that lace weaving from threads is not only beautiful, but also fashionable, but only a professional understands the technique in which the work was done. Romanian lace also belongs to one of the varieties of weaving threads.
Knitting things using the technique of Romanian lace, the models and patterns of which are quite common on the Internet, is an interesting activity. It is popularly called lace knitting. Thanks to this weaving, beautiful and unique things are obtained. Using this technique, the following things are created:

The basis of all products of this type is a special caterpillar cord.
Methods for creating shoelaces
There are several ways to knit lace. Experts divide them into continuous and tear-off.
 In the first case, the crochet cord, the diagrams and step-by-step descriptions of which can be found on specialized sites, is knitted very long. With this method, the needlewoman immediately stocks up with a “caterpillar” for the entire product.
The tear-off method of weaving lace involves the creation of laces of the required length and according to the pattern. In this case, the length of all fragments of the product is carefully measured. However, in both cases, the braid should be knitted with a margin, so that later it is possible to dissolve the edges and sew the product.
For knitting Romanian lace, threads of various colors and thicknesses are used.. Crochet hooks are usually selected according to the thickness of the thread, and recommendations for knitters are on the packaging of the skeins. Beginners should remember that the larger the hook number, the larger the knitting thread should be.
The basics of weaving a caterpillar
A step-by-step crochet pattern for the Caterpillar cord will help you learn Romanian weaving. To do this, you need a skein of thread and a hook:

The same operation is repeated, and a caterpillar of the required length is created.
When the voluminous braid is ready, the thread can be pulled together and cut. Some leave the tail hanging out so that the product can be sewn later, while others hide it in the lace itself.
The second step in the development of technology
Having familiarized yourself with the master class on weaving the main lace for Romanian lace, you can proceed to the creation of the product. For this you will need:

At the very beginning, life-size schemes are selected. After that, the necessary pattern is applied to the selected dense fabric with a marker, and preferably with a pen or pencil, in the form of which the caterpillar will subsequently be laid out. Then the lace is sewn with contrasting threads to the fabric and its edges are sewn together. It is recommended that the edges be butted, not overlapped, so that the contour has a finished smooth appearance. After that, threads in the color of the product are shaped into a braid, fastening its necessary parts.
When the base is ready, they begin to fill the voids between the "body" of the caterpillar. Loops are sewn from top to bottom or from right to left, so that the filling threads run parallel to each other and resemble strings.
Now the strings must, if the pattern requires it, be fastened with a scalloped seam. To do this, a needle with a thread of the same color covers the required number of strings across, as if wrapping them around. Having reached the edge, the needle plunges into the "body" of the caterpillar, the end of the thread is hidden, the needle goes to another place according to the scheme.
 When filling the voids between the contours, it is necessary to monitor the tension of the thread, if it is too tight, then the pattern will “lead”, and if the lace is too weakly filled, then it simply will not hold the necessary shape.
After filling the voids according to the sketch is completed, you can unfasten the resulting lace from the fabric by cutting the threads with which the cord was sewn to the patterned canvas. It is worth noting that the work on filling the lace is always carried out on its wrong side, and therefore now you can safely turn the product over and look at its close-up from the face.
At the end, it is recommended to give the finished product a shape. If this is a napkin, then it can be starched. If an element was knitted that would be a decor on clothes or another object, then it can be sewn to a permanent place.
Varieties of filling canvases
Several techniques for inlaying Romanian lace are known. The most popular, in addition to the classic filling with plain threads, are the Hungarian and Serbian versions.
 Hungarian inlay is to fill the voids between the edges of the caterpillar, which can still be compared with satin stitch embroidery, multi-colored threads according to the intended pattern. For example, you can put a napkin with bright scarlet poppies in the middle on the fabric, and then encrust the product with bright red, black and green threads. In this case, fantasy has no limits, and lace from Romania can be played as the craftswoman's imagination desires.
The Serbian filling of the wicker caterpillar provides for a denser layout of the lace itself. The voids between the products are filled with rare weaves of monophonic or slightly different in tone threads in a few stitches. Serbian lace is often confused with Romanian needlework. It is worth noting that they are quite similar, but thinner braid laces are used in Serbia.